You are currently browsing the tag archive for the ‘fabric’ tag.
Tag Archive
Queen of the Wraith
October 19, 2010 in Film Work, personal Stories, Uncategorized | Tags: Andromeda, buggy bag, buggy bag®, Costume, cutting, fabric, Hive Queen, leather, Stargate Atlantis, Stargate SG-1, Stargate Universe, stingray, Titanic, Twitter, Wraith, Wraith Queen | 14 comments
I’ve been asking on Twitter if anyone would like to hear a bit about the building of the Stargate Atlantis Wraith Queen costumes. I say ‘a bit’ because… well, it was some time ago and I don’t have pics from building the first one, but, I’ll give it my best from what I can remember.
I had just finished a four year stint working as the head cutter in the costume shop on a show by the name of Andromeda. One of my friends was co-ordinator for SG-1 and SG-Atlantis…. yes, two distinctly different shows working out of the same costume shop! A huge job for a shop co-ordinator, but, my friend is that kind of amazing. She asked me if I’d like to come and cut as part of her huge team in her shop, and I jumped at the opportunity to work with her again.
The designer for Stargate Universe was Christina McQuarrie and she gave me the honour and challenge of executing one of her amazing designs for the Wraith Queen. This one was to be made out of a white leather, and utilized a textured pale kid leather along with white StingRay.
As I said, I didn’t have any pics of this, so I found these ones on-line to jog my memory. It seems that the top pics may be action figures… how exciting to think that one of the costumes that I built was made into an action figure!
The coat was very fitted in the top and if I recall, we padded out the bust (a common thing to do) You will notice that the top two pics have blue trim… this is not the original costume. This is someone else’s interpretation of it. The lower pic is an on-set shot and shows the more subtle contrast of the different leathers. The waist cincher was the most difficult aspect of the costume. It was cut out of stingray, which is similar to cutting through a piece of glass that is glued to leather! Very, very horrible to work with. Couple that with the fact that it was bound with leather to finish the edges…. huge job.
The contrast pieces were made out of a lovely textured leather that I backed onto another leather to add stability. They were cut into asymmetrical patterns which were then riveted together and onto the garment. Cuffs were done in the same way and they had an interesting shape on the back side. The over belt was also made in the same way.
You know, it’s funny, the amount of work, time and money that goes into one of these costumes is just amazing… especially when you take into account that I can barely make out what it was or see any of the details from the pics, and I made it! I can only imagine what someone would go through to duplicate it from guess work!
Actually, I can imagine, as I was hired once to duplicate all the dresses from the Titanic as part of a touring theatre exhibit…. I sat for hours and drew pics frame by frame from the movie and I still had to use my imagination for almost all of the backs! I’ll save that story for another post.
I just found this picture of the original costume taken by the set supervisor. It’s a really good shot that shows the details and the fact that there was no blue on the costume.
That was my only season working in the shop at Stargate… many changes happened after that…. Christina McQuarrie moved on to become the illustrious designer of Sanctuary, I started doing contract cutting from my own studio and Valerie Halverson took over as designer of Atlantis (she is now the designer on SG-Universe)
Valerie asked me to do the next Wraith Queen that I built. This was the Hive Queen, her thrown was amazing and she was all connected into it. It looked like some kind of a web/goo…. creepy….
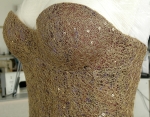
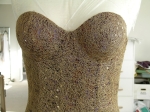
This dress was constructed from the base up. We started with a foundation garment. I cut and stretched the two layers of fabric over the bust, and then hand stitched it onto the bra to give it stability and shape.
 This dress had a centre back invisible zipper and the skirt split in the centre front and had a long train.
The pic shows what a disaster zone my apartment turns into when I’m working… actually it looks pretty good in this shot!
 The outer fabric layer is a gold mesh with sequins in it. It’s really effective because of its random nature.
I was good about taking pictures of the dress, but, I didn’t get any of the building of the the outer layer. The outer layer was like a leather corset, but it was not boned. The leather was extremely stiff and didn’t need any support. It was an embossed, stiffened cow hide that had a shiny finish. The whole thing was built by draping it and stitching it as I went. I then bound all the raw edges with a soft lamb. I think this was a very strong and effective costume for the Hive Queen. Lots of make up though.
If you have any questions you can follow me on Twitter and ask away…. @BuggyBag

Shapes and Sizes
June 20, 2010 in personal Stories | Tags: avant-garde, block, buggy bag, buggy bag®, fabric, Julian Roberts, Kwantlen Polytechnic University, subtraction cutting | 2 comments
I spent all day yesterday out in Richmond at the Kwantlen Polytechnic University, in a master class with designer Julian Roberts. He was doing the class on Subtraction Cutting, something that he invented and has spent his life perfecting. He is very abstract in his thinking and as a result, I think everyone came away feeling inspired.
Subtraction Cutting forces you to look at the garment from a different perspective… the inner, or negative space, as opposed to the front and back view only. You start with the full cloth and take away parts. Instead of deciding what to keep, you decide what to get rid of. It’s quite a leap for someone who has always been dependant on rulers and calculations!
All we used was a sleeveless bodice block and a paper circle…. and two 3 yrd lengths of fabric. The two fabrics are sewn together to resemble an extremely long pillow case… one end open.
Julian demonstrates, using black fabric on one side and white on the other. This makes it easy to see what he’s doing.
Julian joined the front SS to the back SS with a line that he eyeballed, then cut the negative space away. The piece that is removed is called the “Subtraction Pattern”. Just in case you like the final outcome so much that you would like to duplicate it. Otherwise, these creations are very much “one of a kind”.
Now he just pulls the two shoulder seams together and joins them at the machine. Then, starting at the armhole, he joined each SS. Then he let the rest of the fabric just fall. Because of the way he laid his bodice on the fabric, the white portion of the “tube” ends up curving around to the front in a natural swirl.
Now the fun begins… Julian starts to decide where to incorporate the negative spaces where the body will pass through. Each space that is created is joined to a second space to form a hole on the inside of the garment, while the outside begins to transform in a truly organic way…. billows, folds, pleats, twists…. each one different and determined by the designers choices of fabrics and placement of the holes. This is the dress that Julian created in about an hour by removing 7 holes in total.
 These are the two fabrics that I chose… (what I had in my closet that didn’t clash too much) It’s a cotton spandex, so it’s pretty heavy compared to what some of the others chose to use. I started by putting curved corners on my “pillow case”, and placing my bodice so that it wrapped around to the other side, and so it would have that curve across the front. I think I used 7 holes for mine as well….
 That’s me lurching forward in the centre of this shot. Probably a good thing, that way you can’t really see that I’m squeezed into a dress that’s 2 sizes too small!
Here I am with Julian, and below is the dress I made on the proper size form.
![]()
Ok… so, you can see me squeezed into it after all….
The possibilities for this technique are virtually endless from what I can see. I’m looking forward to finding new ways to use this new knowledge! Who knows, maybe I’ll come up with some new avant-garde Buggy Bag®!


